
If you’re like me, you were excited about the drag-and-drop landing page builder released for the Marketing Cloud Account Engagement (the platform formerly known as Pardot) and the Lightning App in winter 2022.
I envisioned a way to easily train folks who couldn’t write code. I thought I would be able to delegate more responsibility. I would be able to release landing page templates to teams, and they wouldn’t be able to alter certain parts of the templates; and all brand standards would stay intact FOREVER! Designing between mobile and desktop would be a breeze. Naïve? Yes.
Don’t get me wrong: The new landing page builder is great. I can do quite a bit of the delegation and templating that I imagined would be possible. But I ran up against some limitations while working on a recent project where we needed to develop oodles of landing pages, and I had to get creative.
So, as Salesforce works hard to roll out new features within the Pardot landing page builder, I thought I’d share some tricks I have developed to further customize my landing pages while still creating templates that my non-coder colleagues can use without fear.
There are three components that I will mention throughout this article:
- The Settings tab allows access to the header and footer code blocks of the landing page.
- The Rich Text component gives you access to the source code.
- The HTML component allows you to insert your own custom code.
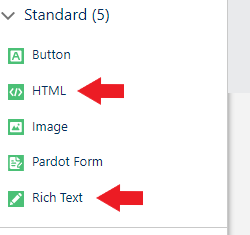
The HTML and Rich Text components in the Components list
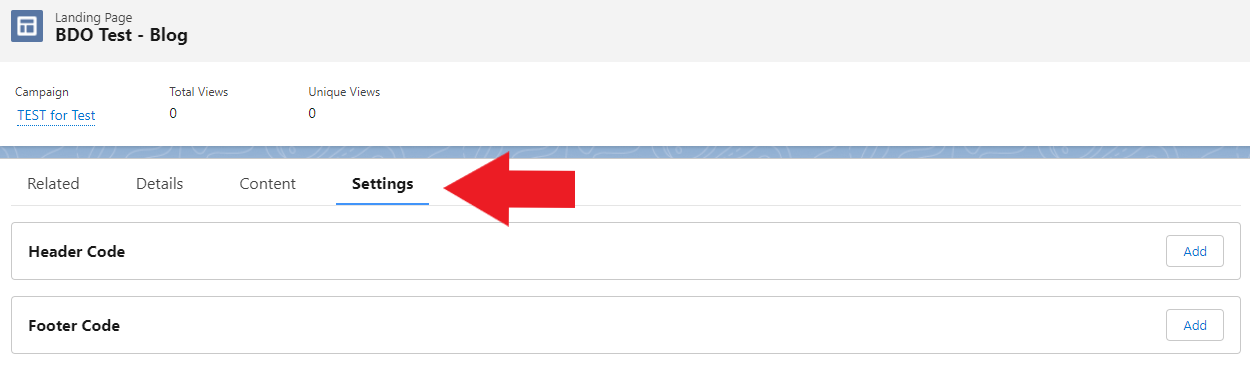
The Settings tab
1. Setting Image Widths for Responsive Design
The first major limitation I found with the landing page builder was the inability to set specific widths for images. The Image component only allows for setting percentages, which makes desktop and mobile views tricky.
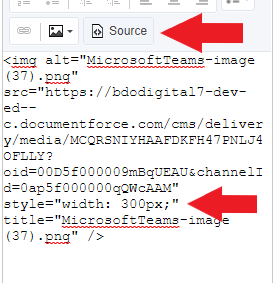
For this hurdle, we can use the Rich Text component as a workaround to set image widths:
- Drag in the Rich Text component.
- Click the Add Image icon.
- Use the source code to set the specific width of the image, as opposed to the default of 100%.
And that is it. You can add more inline code to further customize your static image.
Note: If you replace this image after editing the source code, the source code will default back to 100%. Your team needs to know to not edit this section of your template or else be trained in editing the source code. Use this in the email builder too!
Use cases:
- Keeping social media icons uniform.
- Keeping logos in the header static.
2. Customizing Templates for Mobile and Desktop
The next feature I found myself longing for was the ability to hide elements based on whether the user is on a mobile device or desktop computer. This option would allow me to create designs specific to each view.
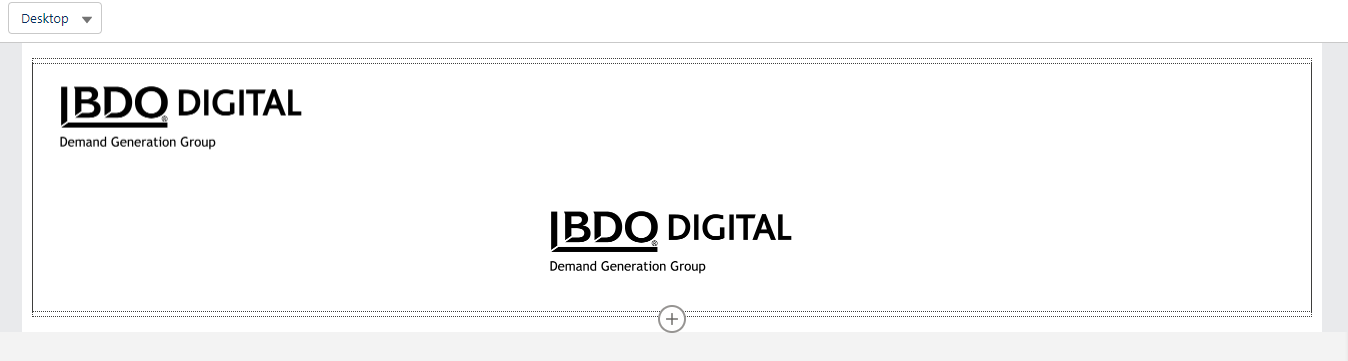
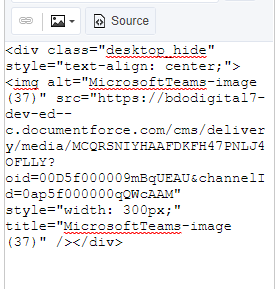
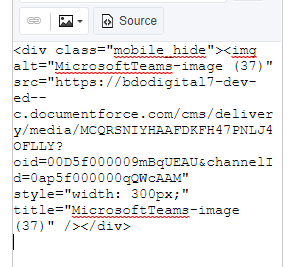
In my example, I wanted my logo to be left-justified on desktop and centered on mobile. For this customization, I need to access the header to add some CSS and the source code for each component. I will be using the steps from the first trick for this.
- Add two Rich Text components to the row and add a logo from the CMS.
- Set the width to 300px for both images. One of the blocks will be centered.
- Save and go to Settings to access the header.
- Now add the following CSS in the Enter Code text box as shown to make the magic happen.
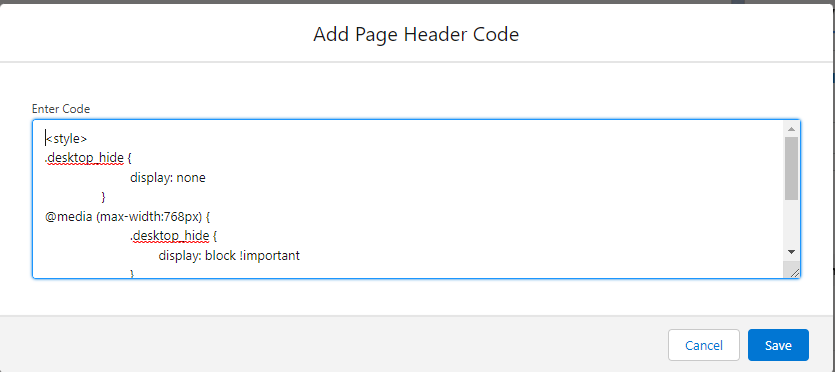
<style>

.desktop_hide {

display: none

}

@media (max-width:768px) {

.desktop_hide {

display: block !important

}


.mobile_hide {

display: none

}

</style>
- Save the page header code.
- Go back into the editor and add the <class> attributes to the corresponding Rich Text block source code.
Ta-da. You can use this trick to hide and show custom HTML blocks too!
Use cases:
- Switch between navigations designed for each viewport (e.g., hamburger menu and traditional navigation).
- Switch between header image sizes or designs for each viewport.
Note: You will not be able to see this effect in the editor. You need to publish and view the live page to test it out. Again, your colleagues will need to know why they are seeing these two seemingly repeating components in your templates. They will need to be properly trained to edit them, or else they need to leave them alone.
3. Using Different Colors for Columns and Rows
Another challenge is setting column colors that are different than the row color. There is no current way to accomplish this using the landing page builder, but you can do it by changing the source code in a Rich Text component.
A layout similar to this one with three cards is possible with this trick. In this example, the row color is white, and the column color is light grey (F0F0F0):

- Set your row color in the Style tab of the editor.
- Lay out your columns, and then add Rich Text components in each column.
- Add a styled <div> around the <h3> and the <p> to achieve the desired outcome. The Rich Text component source code will then be edited like this:
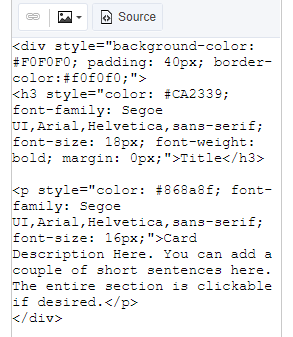
Note: It is possible for the end user to delete the <div>. Make sure your colleagues are trained properly in case this happens while using your template.
4. Styling the Pardot Form Component
Another pain point I found was the Pardot Form component. The Pardot Form component allows for a decent amount of styling, but it is lacking in certain areas, such as spacing around labels. If you are looking for a way to customize your forms with unique check boxes, unique radio buttons and so on, use this trick.
First, you need CSS to style your Pardot form. For reference, here is a great article from Jenna Molby that outlines the Pardot Form CSS Framework & Examples. For non-coders, Jenna also has this amazing Pardot Form Style Generator. Either way, you need to style your form with CSS.
Here’s the trick. When you are creating the form, you can’t rely on the styles you select in the Look and Feel > Styles tab.
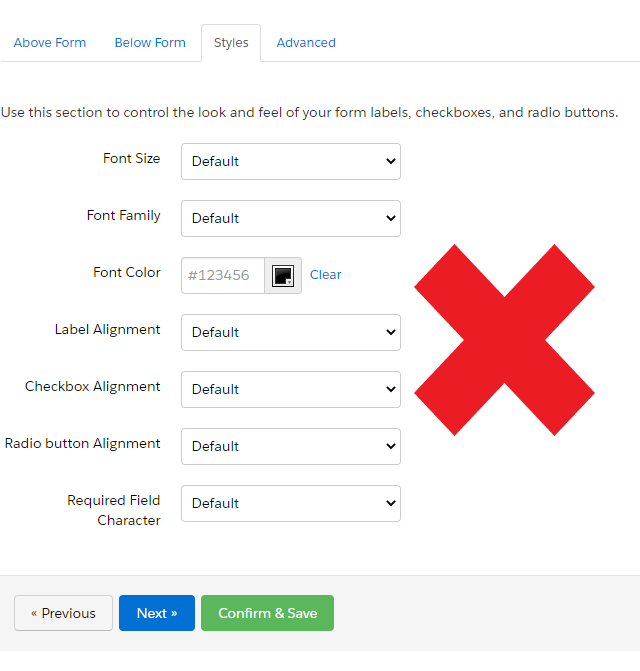
And, apart from background color and position, we are not styling in the landing page builder.

We ARE styling when we create the form, but in the Look and Feel > Above Form tab (specifically, in the source code). Here you can paste your CSS for your more customized form that WILL follow your form into the builder. Again, I have found it easier to use the builder to select the form background color and the form position.
Note: It is important to train your colleagues when and where to edit form styles if you choose to use this method.
There you have it: a few tricks to get the landing page builder to do what you want. Hopefully when you’re going a little bonkers with the tool but determined to stick with what’s best for the client, they’ll make the process less frustrating for you.
If you’re looking for more Pardot tips and best practices, check out this article on reporting on Engagement Studios in Salesforce or this one on grading leads and creating dynamic lists.

Leanna Capel, Implementation Architect, is a certified Pardot specialist and consultant with extensive experience doing what looks like magic, but is really just behind-the-scenes skill. She has used her implementation abilities in many industries, including B2B, B2C, nonprofit and manufacturing. She especially loves mapping out and building integrations between MCAE (Pardot) and nonnative platforms.
The post 4 Handy Tricks for Working With the MCAE (Pardot) Landing Page Builder appeared first on DemandGen.