

The world of marketing is an endless sea of opportunities to automate tedious and repetitive tasks with programming. These days, much of the required automation can be done natively within MAP and CRM platforms that leverage the magic of APIs. In this article, I will demonstrate how to develop a process that extracts lead data from Adobe Marketo Engage in the form of a CSV file.
Here’s the scenario: You’re launching a promotion offering free t-shirts to your top prospects and clients. You will send them an email that links to a form they will fill out with their name, email address and t-shirt size. Every day, you will supply your dependable fulfillment partner of 15 years, SpeedyShip, with a CSV file of people who filled out the t-shirt request form on the previous day. SpeedyShip will email the requestor to confirm their t-shirt size and acquire a shipping address. As reliable as SpeedyShip has been, they have not caught up to technology, and they need the CSV provided to them either by email or through a file-sharing platform (e.g., Box or Dropbox).
In this demo, we’re writing a Python script that connects to Marketo, pulls field values for leads that filled the t-shirt request form the previous day, and creates a CSV file named tshirt_fulfillment.csv.
While this article touches on many technical topics, I want to focus on the Python aspect of the solution. Alongside some basic Python programming knowledge, I will also assume that you are familiar with and comfortable navigating Marketo.
First, a little bit about Python. If you read my previous article, 6 Ways Python Can Automate Tedious Processes for the Modern Marketer, then you know that Python is my go-to scripting language for many projects. I choose Python because I find it extremely easy to use (it has an English-like syntax), it supports all major operating systems (Windows, Mac and Linux) and it has a vast support system of native and open-source modules (code libraries that simplify complex processes).
OK, enough of me crushing on Python.
Next, let’s talk a little about application program interfaces, or APIs. APIs are interfaces for specific programming languages or language frameworks that allow programmers to connect to and use external platforms and resources. The API we’re leveraging in our solution is a type called a REST (representational state transfer) API.
While a more comprehensive discussion of the topic is available at restfulapi.net, it’s enough for our purposes to know that REST APIs allow programmers to make requests over HTTP protocol, much like calls you make when you visit a website with your internet browser. Marketo provides REST APIs that allow programmers to access features typically available in their web interface — for example, instead of using the import list function to upload leads, you could automate that process programmatically using the API.
I think that covers the basics. Let’s get to the demo.
Create a Form and Filter Leads in a Smart List
First, a bit of prep work. The form that we build needs to collect the requestor’s t-shirt size (XS, S, M, L, XL, 2XL, 3XL). To support this data capture, I created a new string field in Marketo named “Shirt Size”.

In the field details, note that the API Name for the new field is “shirtSize”. We will incorporate this value in our solution later.
Next, let’s build a form. Here’s a screenshot of the very simple form that I built named “tshirt-request” (we’ll need this form name later).
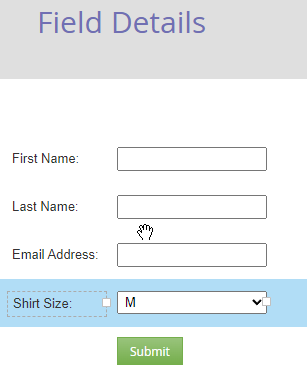
The Shirt Size field has a Field Type of Select with option values of XS, S, M, L, XL, 2XL, 3XL.
When I select the form in Marketo, I see one of these URLs in my web browser, depending on whether I’ve selected the Marketo “New Experience” or not.


The numerical value that I’ve highlighted in red (1342) is the form ID for this specific form that I created. Marketo automatically generates a unique ID for every form (and every asset), so this ID will not be the same ID that Marketo generates for your form if you duplicate the form shown.
At this point, you can add the form to a landing page (Marketo or external) and submit a few test records. I generated test data with Mockaroo and used a separate script to push the records to the new form (using the CSV file from Mockaroo and the new form ID). I won’t go into the details of this data import process in this article, because I want to focus on the data extraction process. You can add as many records as you’d like manually via the newly created form.
OK, now that we have test records in Marketo, we need a method of referencing these specific records. Since SpeedyShip needs the details of leads that submitted a request on the previous day, we’ll create a Smart List to accomplish this. I named the Smart List “yesterday’s tshirt requests” and used these criteria:
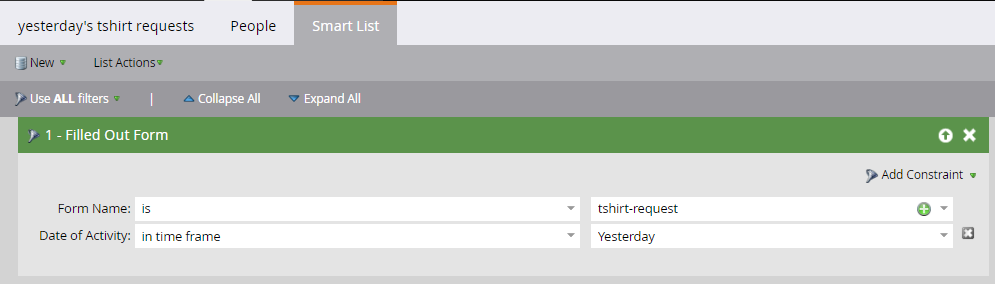
This Smart List simply filters all Marketo leads for those that filled out the “tshirt-request” form “Yesterday”. (, for the purposes of this demo, you need to temporarily modify the time frame value from “Yesterday” to “Today” or “This Month”, since you created the sample form submission entries today.)
Looking at the Smart List URL in the web browser, I see that the Smart List ID is 26948. We’ll need this ID value for our solution in a little bit.

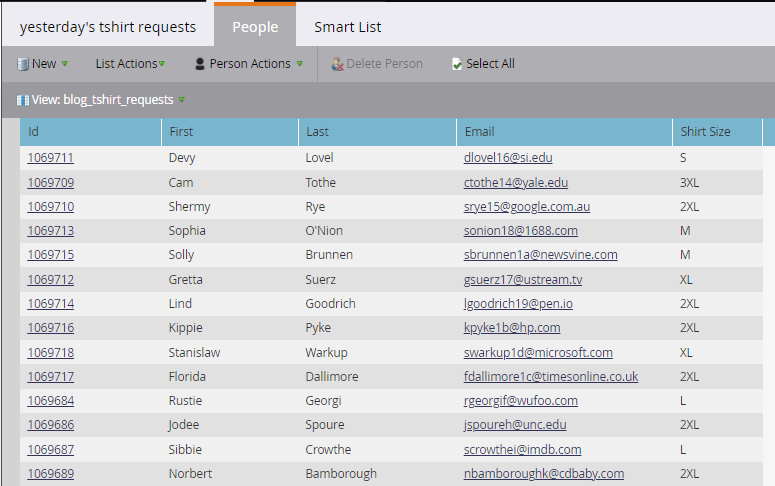
Here’s a view of some of the records:
Now, I’m also assuming that you already have Python installed on your machine. If not, head on over to the official Python site for instructions on how to download and install the latest version of Python 3.
Marketo provides a rich library of reference documentation on how to use their API. You’ll need someone with admin permissions to create an API role, user and service in order to leverage the API. The authentication process is described in the documentation.
From this authentication process, you need three critical pieces of information:
- Client ID
- Client Secret
- Munchkin ID
Set Up Your Python Environment
Now that we have collected all the required values, we can begin with the Python script.
First, I created a script named vault.py with the following entry:
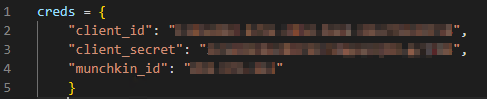
This file just contains a dictionary variable (a series of pairs) to store my sensitive Marketo credentials. I’ve blurred out these values for the sake of security, and you should never share nor expose your Marketo credentials.
We’ll make use of a wonderful module by the name of marketorestpython, written by a genius by the name of Jep Castelein. This module simplifies the use of the Marketo API tremendously.
To install this module, open a terminal on your computer, type the following command and hit Enter on your keyboard:
pip install marketorestpython
This command installs the library on your machine and makes it ready for use.
Next, create a new file named extract_tshirt_leads.py in the same folder where you created the vault.py file. Begin by importing the modules:
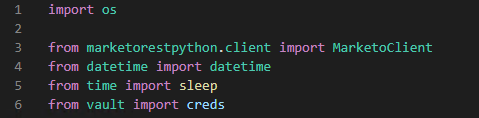
- The os module provides methods to interact with the local operating system.
- The marketorestpython module is the library we just installed, and we’ll be leveraging it heavily in the rest of the solution.
- The datetime library provides methods and functions surrounding dates and times.
- From the time module, we’ll leverage the sleep This function tells the process to sleep, or wait patiently, for X number of seconds.
- The vault library is actually a reference to the vault.py file we created and an import of the creds variable that contains our sensitive credentials.
Next, we do a little preparation by setting our working directory to the folder where our scripts are located (lines 12 and 14). This step ensures that the file we export from Marketo is saved in the same folder as our solution. , and you’ll probably want to create a separate folder to archive these daily files. We also create a connection to Marketo with the credentials that we saved in the creds dictionary in our vault.py file (lines 17 through 20). We assign a reference to this Marketo connection in a variable named mc (line 20).

The rest of the process gets a bit more complex. I will walk you through it, but here are the basic steps involved:
- Define an export job: Provide Marketo with the details of the extraction we want.
- Queue the export job: Tell Marketo to execute the export process based on the definition above.
- Wait for the export job to complete.
- Export the records to a CSV file.
Marketo’s thorough explanation of the lead extraction process can be viewed here.
Extract Marketo Leads With a Python Script
And now we continue with the code.
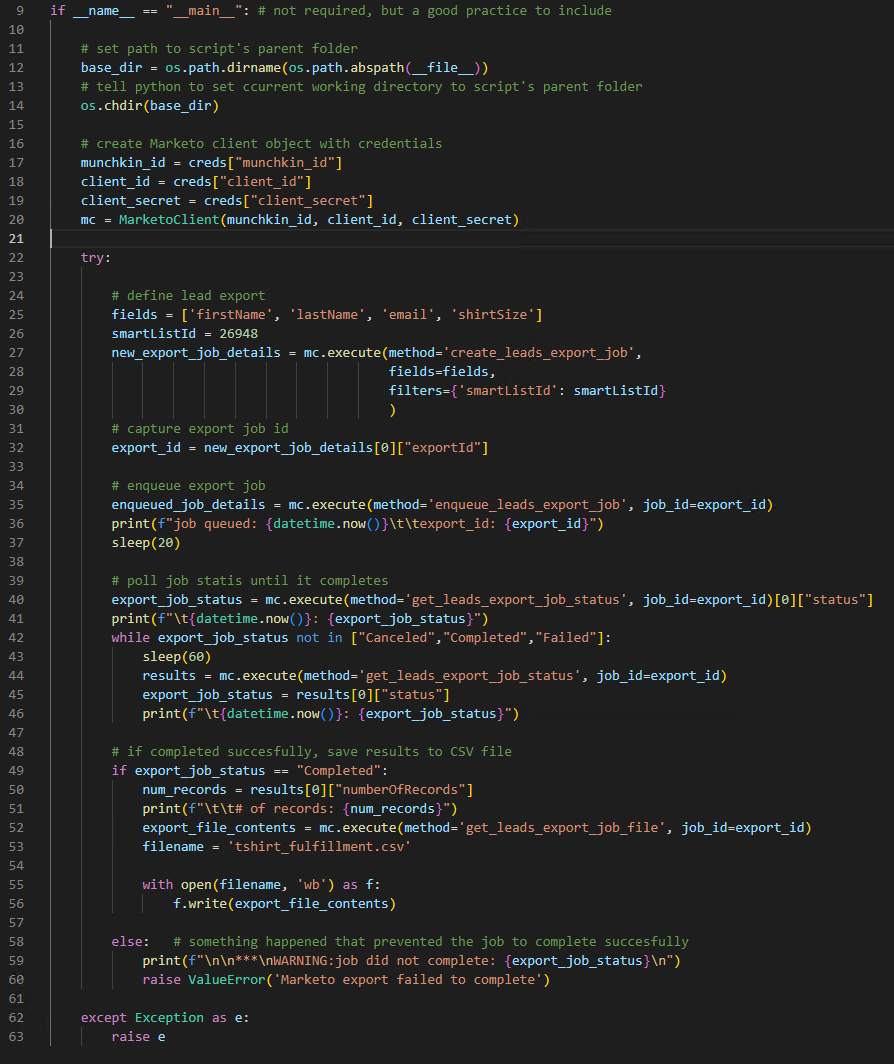
Let’s walk through the screen capture of the code shown.
- We encapsulate the remaining process in a try statement (line 22), which lets us control what happens in case of an error. For example, if the Marketo REST API happens to be offline because of a scheduled upgrade, line 62 catches this error, and on line 63, we could do something fancy like email ourselves with the exact error message. In this demo, we simply raise the error that we catch, which will be displayed in our terminal, and then halt our process.
- On line 25, we create a variable named “fields”, which is a list of fields that we want to extract from Marketo, since we need to provide the API names of the fields. The Marketo extract will always include the Lead ID (API Name = ID) field, whether it’s included in the field list or not. We can obtain API names of specific fields from the field details page in Marketo, like the one where we obtained the “Shirt Size” field API Name above.
- On line 26, we set the value of the variable “smartListId” to the ID of the Smart List that we created (“yesterday’s tshirt requests”). In this case, that value is 26948.
- On lines 27 through 30, we use the “execute” method of our Marketo reference (mc) to call the “create_leads_export_job” procedure. In this call, we supply the list of fields that we want to extract (line 28) and the filter method to apply on the leads (line 29). For the filter parameters, we inform Marketo that we want to leverage a Smart List filter and supply the ID of the Smart Filter that we created. The result of this call is saved to a variable named “new_export_job_details”.
- On line 32, we save the ID value of the export job that we just created into a variable named “export_id”. We’ll use this ID often in the remaining steps.
- On line 35, we use the “execute” method again, this time to enqueue (run) the export job that we just created. For this call, we just need to provide the value of the ID (saved in the “export_id” variable) of the job we created. On line 36, we are simply printing out a message in the terminal indicating that we’ve queued the job, the current date and time, and the ID of the export job.
- On line 37, we just tell our program to sleep for 20 seconds to give Marketo time to process the enqueue step.
- Once the program reaches line 40, we ask Marketo for the current status of the job that just queued and save that status value to a variable named “export_job_status”. This value will be one of the following:
- Created: The job has been defined and created but has not yet been executed.
- Queued: The process has been queued and is waiting to be processed.
- Processing: The job is currently processing.
- Canceled: The job was queued and subsequently canceled.
- Failed: The job was queued and subsequently failed for some reason.
- Completed: The job was processed and completed successfully. The records are now ready for export.
- In lines 42 through 46, we create a while (looping) statement to evaluate (line 42) the value stored in “export_job_status”. While the status is still in a waiting state (Queued or Processing), the program sleeps for 60 seconds (line 43) before polling Marketo (line 44) for the job status again, and then prints out (line 46) the current date/time. When the job reaches a finish state (Canceled, Completed or Failed), our program exits the loop and resumes. On line 44, we save the entire results of the “job status” call to a variable named “results”.
- On line 49, we evaluate the finished status of the job (saved to the “export_job_status” variable), and if that value is “Completed”, we resume the export process. Otherwise, we print a message (line 59) that the job failed to complete and exit the program.
- If the export job finishes with a “Completed” status, we query the “results” variable (line 50) for the number of records found by our export request. On line 51, we print out a message with the number of records. These steps are optional and informational.
- Finally, we export the data of the Marketo leads on line 52 to a variable named “export_file_contents” by calling the “get_leads_export_job_file” method of our Marketo connection. By default, the data is in CSV format and encoded in UTF-8.
- On line 53, we define the name of the output file to a variable named “filename”.
- On lines 55 and 56, we create a new file and save the contents of the export to the new file.
The script is executed with the following terminal command:
python extract_tshirt_leads.py
Note: Depending on how you have python 3 setup on your machine, you may have to execute scripts with the following command instead: python3 extract_tshirt_leads.py
When completed successfully, our terminal should display something along the lines of the following:
job queued: 2022-05-30 15:00:38.657401
export_id: 10444a66-719d-4cc6-a033-28f950e4c3f2
      2022-05-30 15:00:58.852788: Queued
      2022-05-30 15:01:58.953301: Completed
            # of records: 100
…and we now have a CSV file named tshirt_fulfillment.csv containing the records to share with SpeedyShip.
Sample of tshirt_fulfillment.csv file (raw format):
firstName,lastName,email,shirtSize
Lovell,Wyett,lwyett0@addthis.com,S
Judye,Heisham,jheisham1@psu.edu,XS
Jozef,Riley,jriley2@omniture.com,XL
Melany,Kerford,mkerford3@examiner.com,XL
Falkner,Wittey,fwittey4@etsy.com,3XL
Meggie,Brookesbie,mbrookesbie5@utexas.edu,XL
Kelley,Northbridge,knorthbridge6@homestead.com,XS
Gerty,Fost,gfost7@bizjournals.com,L
Neille,Cruddace,ncruddace8@bandcamp.com,2XL
Cloe,Chavrin,cchavrin9@yellowbook.com,3XL
Depending on how SpeedyShip can accept the file, we may also be able to automate the file delivery in our Python script (as extra steps in the same program). Python can deliver data files via email, FTP and SFTP, but it’s not limited to those methods by any means. If there is an API for a file-sharing platform (such as Box, Dropbox or AWS S3), it can be leveraged as the delivery method via Python. But that is for another article.
I hope you enjoyed this article and found it useful.
Here’s the extract_tshirt_leads.py script in its entirety:
import os

from marketorestpython.client import MarketoClient
from datetime import datetime
from time import sleep
from vault import creds


if __name__ == "__main__": # not required, but a good practice to include

    # set path to script's parent folder
    base_dir = os.path.dirname(os.path.abspath(__file__))

    # tell python to set ccurrent working directory to script's parent folder
    os.chdir(base_dir)

    # create Marketo client object with credentials
    munchkin_id = creds["munchkin_id"]
    client_id = creds["client_id"]
    client_secret = creds["client_secret"]
    mc = MarketoClient(munchkin_id, client_id, client_secret)

try:

    # define lead export
    fields = ['firstName', 'lastName', 'email', 'shirtSize']
    smartListId = 26948
    new_export_job_details = mc.execute(method='create_leads_export_job',
        fields=fields,
        filters={'smartListId': smartListId}
    )

    # capture export job id
    export_id = new_export_job_details[0]["exportId"]

    # enqueue export job
    enqueued_job_details = mc.execute(method='enqueue_leads_export_job', job_id=export_id)
    print(f"job queued: {datetime.now()}\t\texport_id: {export_id}")
    sleep(20)

    # poll job statis until it completes
    export_job_status = mc.execute(method='get_leads_export_job_status', job_id=export_id)[0]["status"]
    print(f"\t{datetime.now()}: {export_job_status}")
    while export_job_status not in ["Canceled","Completed","Failed"]:
        sleep(60)
        results = mc.execute(method='get_leads_export_job_status', job_id=export_id)
        export_job_status = results[0]["status"]
        print(f"\t{datetime.now()}: {export_job_status}")

    # if completed succesfully, save results to CSV file
    if export_job_status == "Completed":
        num_records = results[0]["numberOfRecords"]
        print(f"\t\t# of records: {num_records}")
        export_file_contents = mc.execute(method='get_leads_export_job_file', job_id=export_id)
        filename = 'tshirt_fulfillment.csv'

        with open(filename, 'wb') as f:
            f.write(export_file_contents)

    else:  # something happened that prevented the job to complete successfully
        print(f"\n\n***\nWARNING:job did not complete: {export_job_status}\n")
        raise ValueError('Marketo export failed to complete')

except Exception as e:
    raise e

Rick Segura, Manager of MarTech Developers, is a vastly experienced data guru. Having 20+ years of database experience, Rick is a master of ETL (data processing), data merging & aggregation, report & dashboard development, data analysis and automation. He is very passionate about delivering intuitive, purposeful data-based solutions.
The post How To Extract Leads From Marketo Using Python appeared first on DemandGen.


